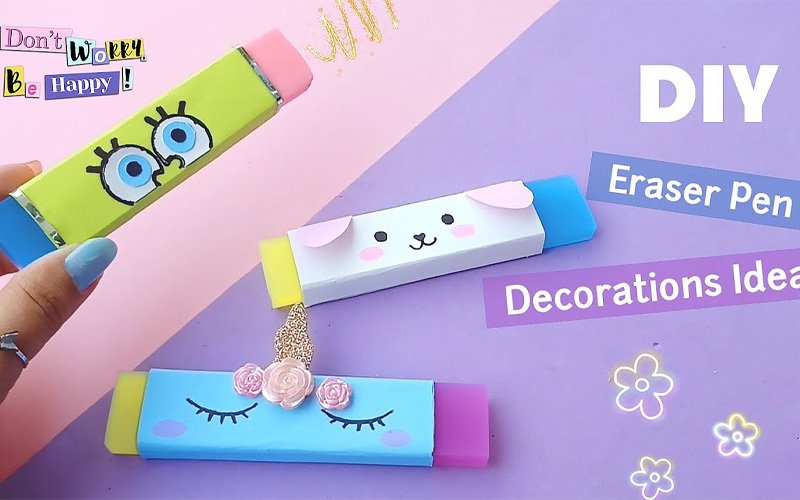
In a world where creativity knows no bounds, engaging kids in hands-on activities that combine fun and functionality is a delightful way to spend quality time together. Crafting custom erasers at home is a fantastic project that not only lets kids express their artistic flair but also results in practical tools for their schoolwork. Let’s embark on a creative journey and learn how to make personalized erasers that are as unique as the young minds creating them.
Materials Needed:
- Eraser Clay: Obtain eraser clay in a variety of colors. This special polymer clay is designed to create functional erasers when baked.
- Clay Sculpting Tools: Basic clay sculpting tools like a rolling pin and shaping tools will help shape and mold the eraser clay.
- Pencil or Eraser Mold: You can use molds designed for erasers or pencil toppers. Alternatively, create your own molds using silicone or similar mold-making materials.
- Baking Oven: A regular home oven is suitable for baking eraser clay.
- Baking Tray: Line a baking tray with parchment paper to keep the erasers clean during baking.
Step-by-Step Guide:
1. Set Up Your Creative Space: Create a clean and well-lit workspace where you and the kids can comfortably engage in the crafting process.
2. Choose and Visualize Designs: Let your imagination soar! Decide on the designs for your erasers. It could be anything from animals and shapes to emojis and more. Encourage the kids to visualize their creations.
3. Knead the Eraser Clay: Take a small portion of eraser clay and knead it in your hands. Kneading softens the clay, making it easier to work with.
4. Shape the Erasers: Using your hands or clay sculpting tools, shape the clay into the chosen designs. You can also press the clay into molds to achieve specific shapes.
5. Add Creative Details: Enhance your erasers with small pieces of differently colored clay. These additions bring your designs to life—add eyes, spots, patterns, or whatever sparks creativity.
6. Bake Your Creations: Preheat your oven as per the instructions on the eraser clay packaging. Place the shaped erasers on a parchment paper-lined baking tray. Bake them according to the recommended time and temperature.
7. Cool and Harden: Carefully remove the baked erasers from the oven and let them cool completely. The cooling process will solidify the erasers, making them ready for use.
8. Test and Admire: After cooling, test the erasers to ensure they work effectively. Revel in the satisfaction of your functional and artistic creations.
9. Optional Decorations: If desired, you can further decorate the erasers using markers or paint. Ensure the materials used for decoration are safe and non-toxic for kids.
10. Packaging with Love: For a finishing touch, place the erasers in small clear plastic bags or wrap them in colorful tissue paper. This adds a touch of personalization and makes them ready for gifting.
Inspiring Creativity and Practicality:
Crafting custom erasers at home opens a world of possibilities for kids and adults alike. Not only do these erasers erase pencil marks, but they also symbolize the power of imagination and hands-on creativity. Through this project, kids learn that they can transform everyday items into personalized works of art that are both functional and expressive.