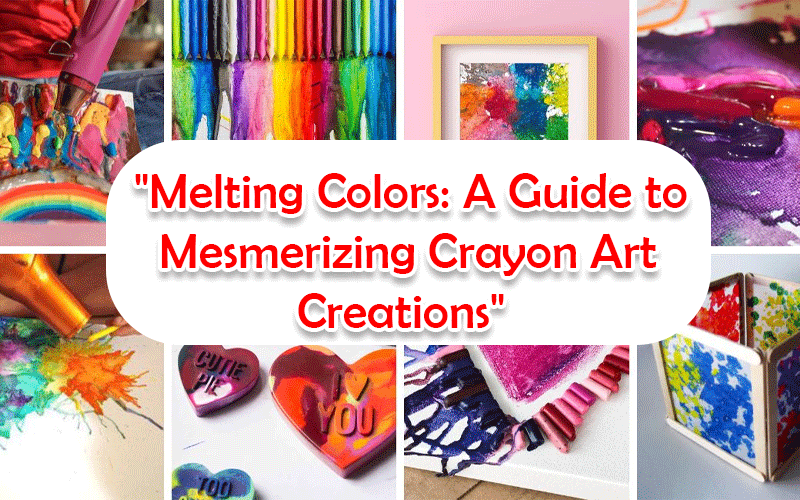
Crayon art is a fascinating and vibrant form of creative expression that involves using crayons to create unique and visually appealing artworks. This technique allows you to blend colors, experiment with textures, and produce eye-catching designs. Here’s a step-by-step guide to creating your own crayon art masterpiece:
Materials Needed:
- Canvas or thick paper
- Crayons (broken into small pieces or unpeeled)
- Hot glue gun and glue sticks
- Hairdryer
- Apron or old clothes (to protect from crayon splatters)
- Newspaper or drop cloth (to protect your workspace)
- Masking tape (optional)
- Stencils or painter’s tape (optional)
Steps:
- Prepare Your Workspace: Set up your workspace by laying down newspaper or a drop cloth to catch any crayon drips or splatters. Make sure your surface is protected, as crayons can be messy.
- Plan Your Design: Decide on the design you want to create. You can freestyle or use stencils, painter’s tape, or masking tape to create shapes and patterns on the canvas.
- Secure Crayons: Use a hot glue gun to attach the crayon pieces to the top of the canvas. You can arrange them in a rainbow pattern, gradient, or any other arrangement you prefer. The glue will act as an adhesive to hold the crayons in place.
- Protect Surroundings: If you’re working with a design that requires specific colors to be isolated, you can use masking tape to cover the surrounding areas and keep them clean.
- Melt the Crayons: Put on your apron or old clothes to protect yourself. Use a hairdryer on the highest heat setting to melt the crayons. Point the hairdryer downward, so the melted wax drips onto the canvas. You can hold the canvas at an angle to guide the wax flow in different directions.
- Blend and Create Patterns: Tilt the canvas or use the hairdryer’s airflow to blend the melted wax and create patterns. Experiment with different angles and techniques to achieve the desired effect.
- Cool and Set: Allow the melted crayon to cool and solidify. This will take a few minutes. Make sure not to touch the wax while it’s still hot.
- Finishing Touches: Once the crayon wax is completely cooled and solid, you can remove any masking tape or stencils if you used them. Your crayon art masterpiece is now complete!
Tips:
- Experiment with different crayon colors and arrangements to create unique and captivating designs.
- You can incorporate other art supplies like acrylic paint or markers to enhance your crayon art.
- Consider using a heat gun instead of a hairdryer for more precise control over the wax melting process.
- Crayon art can be messy, so be prepared for some wax splatters and drips. Wearing protective clothing and covering your workspace is essential.
Crayon art offers endless possibilities for creativity, making it an enjoyable and rewarding activity for artists of all ages and skill levels. So, gather your materials, unleash your imagination, and let the vibrant world of crayon art unfold on your canvas!