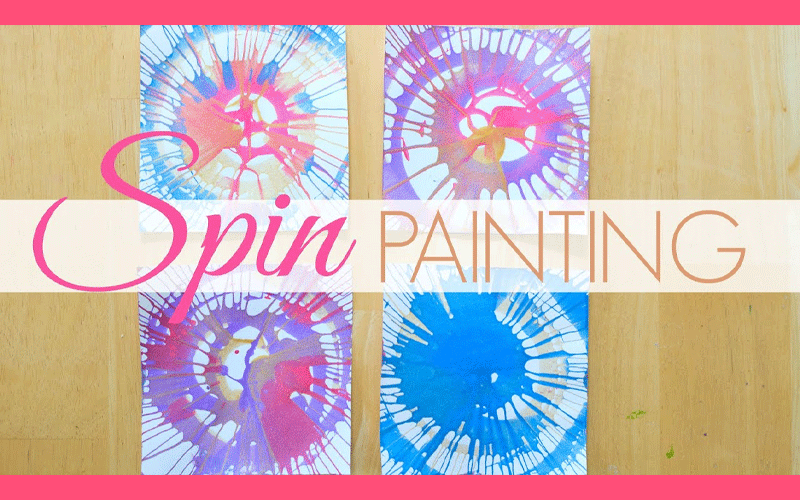
Spin art is a delightful activity that allows children to unleash their creativity and explore the vibrant world of colors. With spin art machines, kids can create mesmerizing masterpieces filled with dynamic patterns and eye-catching designs. This article will guide you through the exciting process of spin art, from setup to display, providing inspiration and tips for an enjoyable and artistic experience for kids.
Materials needed:
- Spin art machine (available in stores or online)
- Washable paints or inks in various colors
- Small plastic squeeze bottles or droppers
- Paper or cardstock cut into appropriate sizes for the spin art machine
- Additional tools like brushes, cotton swabs, glitter, confetti, and stencils (optional)
- Protective covering for the workspace
- Flat surface for drying and displaying the artwork
Step 1: Set Up the Spin Art Machine
Follow the manufacturer’s instructions to assemble the spin art machine. Ensure the turntable is securely attached to the base and spins smoothly. Place a protective covering, such as a plastic tablecloth or newspaper, on the work surface to prevent any messes.
Step 2: Gather Art Supplies
Collect the art supplies needed for the spin art session. Fill the squeeze bottles or droppers with washable paints or inks in a variety of vibrant colors. Cut the paper or cardstock into suitable sizes to fit the spin art machine. Consider having additional tools like brushes, cotton swabs, glitter, confetti, and stencils for added creativity.
Step 3: Set Up the Paint Station
Arrange the paint station near the spin art machine. Position the bottles of paint or ink within easy reach of the child. If desired, dilute the paint with water to achieve different effects or experiment with different consistencies.
Step 4: Encourage Creativity
Invite the child to explore their creativity by experimenting with different colors and techniques. Encourage them to apply drops of paint directly onto the spinning paper or use brushes and cotton swabs to create strokes and textures. They can also blow on the paint to create unique splatter effects. Remind them to keep their hands and tools a safe distance away from the spinning turntable.
Step 5: Incorporate Additional Materials (Optional)
For an extra touch of creativity, children can incorporate additional materials into their spin art. They can sprinkle glitter, confetti, or small sequins onto the wet paint or use stencils and cutouts to create specific shapes or patterns. Let their imagination run wild!
Step 6: Let the Spin Art Dry
Once the desired design is achieved, carefully remove the paper from the spin art machine and place it on a flat surface to dry. It’s important to handle the wet artwork with care to avoid smudging or smearing. Ensure the drying area is safe from any accidental spills.
Step 7: Display and Appreciate the Artwork
Once the spin art is completely dry, it’s time to display and appreciate the colorful masterpieces. Create a rotating display or choose a few favorite pieces to frame and hang on the wall. Encourage the child to share their artwork with family and friends, fostering a sense of pride and accomplishment.
Conclusion:
Spin art provides an exciting and engaging way for kids to explore color, patterns, and their own creativity. By following the steps outlined in this article, you can facilitate an enjoyable spin art experience that encourages imagination and artistic expression. Embrace the vibrant world of spin art and watch as your child’s creativity comes to life in colorful and dynamic masterpieces.